Mangos! Avocados! Jalapeños! Pickled red onion! Pistachios! 

These ingredients are magical and really sing on a plate together. 


Arugula Salad With Mango And Avocado

For the salad, you will need:

3-4 big handfuls of (washed and dried) arugula

2 ripe mangoes, cut into chunks

2 ripe avocados, cut into chunks

1/4 c pickled red onion

1/2 c salted pistachios

1/2 a fresh jalapeño, thinly sliced or diced*

*Optional


For the dressing, you will need:

juice of one lime (lemon works too)

chopped cilantro (1-2 TBSP)

a few shakes of adobo ( I use Goya)

2-3 TBSP olive oil


I put the arugula on the bottom, then add the mango and avocado. I follow the fruit with the pickled onions. Sprinkle pistachios over the top. Add the dressing and you're looking at a very tasty salad. 


Enjoy!  


 If you're ever looking for an active, outdoorsy activity for your family, consider doing a family bike ride through The Meadows in Wethersfield. You'll find the entrance to The Meadows if you make a right off the the I-91N exit for Old Wethersfield (exit 26). This bike path goes through a wooded area before opening up to beautiful farmland.  

If you follow The Meadows trail for about five miles you wind up at The Ferry Park in Rocky Hill. Ferry Park Grille is located within the Ferry Park.  The grille offers a ton of great food options, including hotdogs, hamburgers, and excellent lobster rolls. 

You can have lunch at the grille and then either take the ferry across the river to Glastonbury or turn around and ride back to Wethersfield.  All said and done, the trail is about ten miles. 

My nine-year-old did this trip riding his own bike, but younger kids may need to be pulled on a bicycle-built-for-two or in a little trailer attachment.  When our kids were young, my husband or I would use the following for towing the tots:

https://www.rei.com/product/254220/burley-bee-bike-trailer-double

It is pricy, but we used this all the time. 

I hope you'll try this little trip.  


Pro Tip: Doing this before the day gets too hot is a good idea. 


     I can say with certainty that this summer my family and I will be doing more than we did last summer. That's not saying much because last summer we did nothing at all.  While I won't be bringing my family to indoor events yet, there's a lot Connecticut has to offer in the way of outdoor activities. 

You'll fine my Summer 2021 Bucket List below:


1. Lavender Pond Farm (Killingworth, CT)

I have never been here before, but I've always wanted to visit.  Strolling through fields of lavender sounds lovely to me. They also sell lots of lavender products- I'm looking at you, Lavender Lemonade!

www.lavenderpondfarm.com


2. AquaventuresCT (Glastonbury, CT)

This is a canoe and kayak rental, located on the Connecticut River. They offer paddle boards, kayaks, canoes, and paddle boats (for four). It looks like the rentals are for 1-5 hours. 

www.aquaventuresct.com 


3. Slipaway River Tours

Slipaway offers public and private tours of the Connecticut River. Departure docks include Wethersfield Cove, Glastonbury Riverfront Park, and Rocky Hill Ferry Park. 

www.slipawayrivertours.com


4. Elizabeth Park (West Hartford, CT)

We have been here many times, but we could go here a million times more and still be excited out it. The gardens are beautiful, there is a playground in one part of the park, and there is plenty of space for a summer picnic. This park also has a summer concert series. 

www.elizabthparkct.org


5. Buttonwood Farm (Griswold, CT)

From July 21-August 1, Buttonwood Farm sells bouquets of sunflowers and 100% of the proceeds go to Make A Wish Foundation of Connecticut. They grow 14 acres of sunflowers and they are beautiful. The farm also has a cool hayride and they make their own really tasty ice cream. I have brought my oldest son here, but I'm excited to bring both kids. 

www.buttonwoodfarmicecream.com


These are just a few of the activities I'm looking forward to. 

Have a great summer!!


Every year, I grow zucchini in the garden. It's usually just one plant, but I always have a ton of zucchini.  I have had to get creative with new ways of using this abundant veggie.

I have made a lot of zucchini bread in the past, but I wanted to try a new variation.  After a trip to a wonderful local spice shop (Penzeys in West Hartford), I thought I'd try anise instead of cinnamon in the recipe. I know you either love anise or hate, but I LOVE it!

Side Note: Penzeys is a cool spice shop to bring a child.  They have a smelling sample jar for each spice in the shop. If you're talking to your kids about their senses (especially the sense of smell) it's a great place to explore that. They also have a kid corner with coloring activities.


Zucchini Muffins With Anise

1 1/2 c flour
1 TBSP ground anise, plus a pinch or two
1/2 tsp baking soda
1/4 tsp salt
1/4 tsp baking powder
1 egg
1 c sugar
1 c shredded zucchini
1/4 c oil
1/2 c chopped nuts (optional)

Preheat the oven to 350.  Mix the sugar, oil, egg, and zucchini in a large bowel. Add the dry ingredients. Pour the batter into lined (or greased) muffin tins. Bake for 20 minutes. Check for doneness.  Enjoy!

This goes really well with tea. If you can't get enough of that licorice flavor (and happen to be nursing), I recommend Mother's Milk Tea to go with it. 


As it is June, strawberry season is in full swing! A great activity for toddlers, strawberry picking gets everyone outside and allows children to taste the fruits of their labor. 

If you are looking for new ways to use up the extra berries, try making freezer jam.  Kids have fun mashing up the berries and it is not as time consuming or complicated as regular jam-making. I used this recipe.

Enjoy!


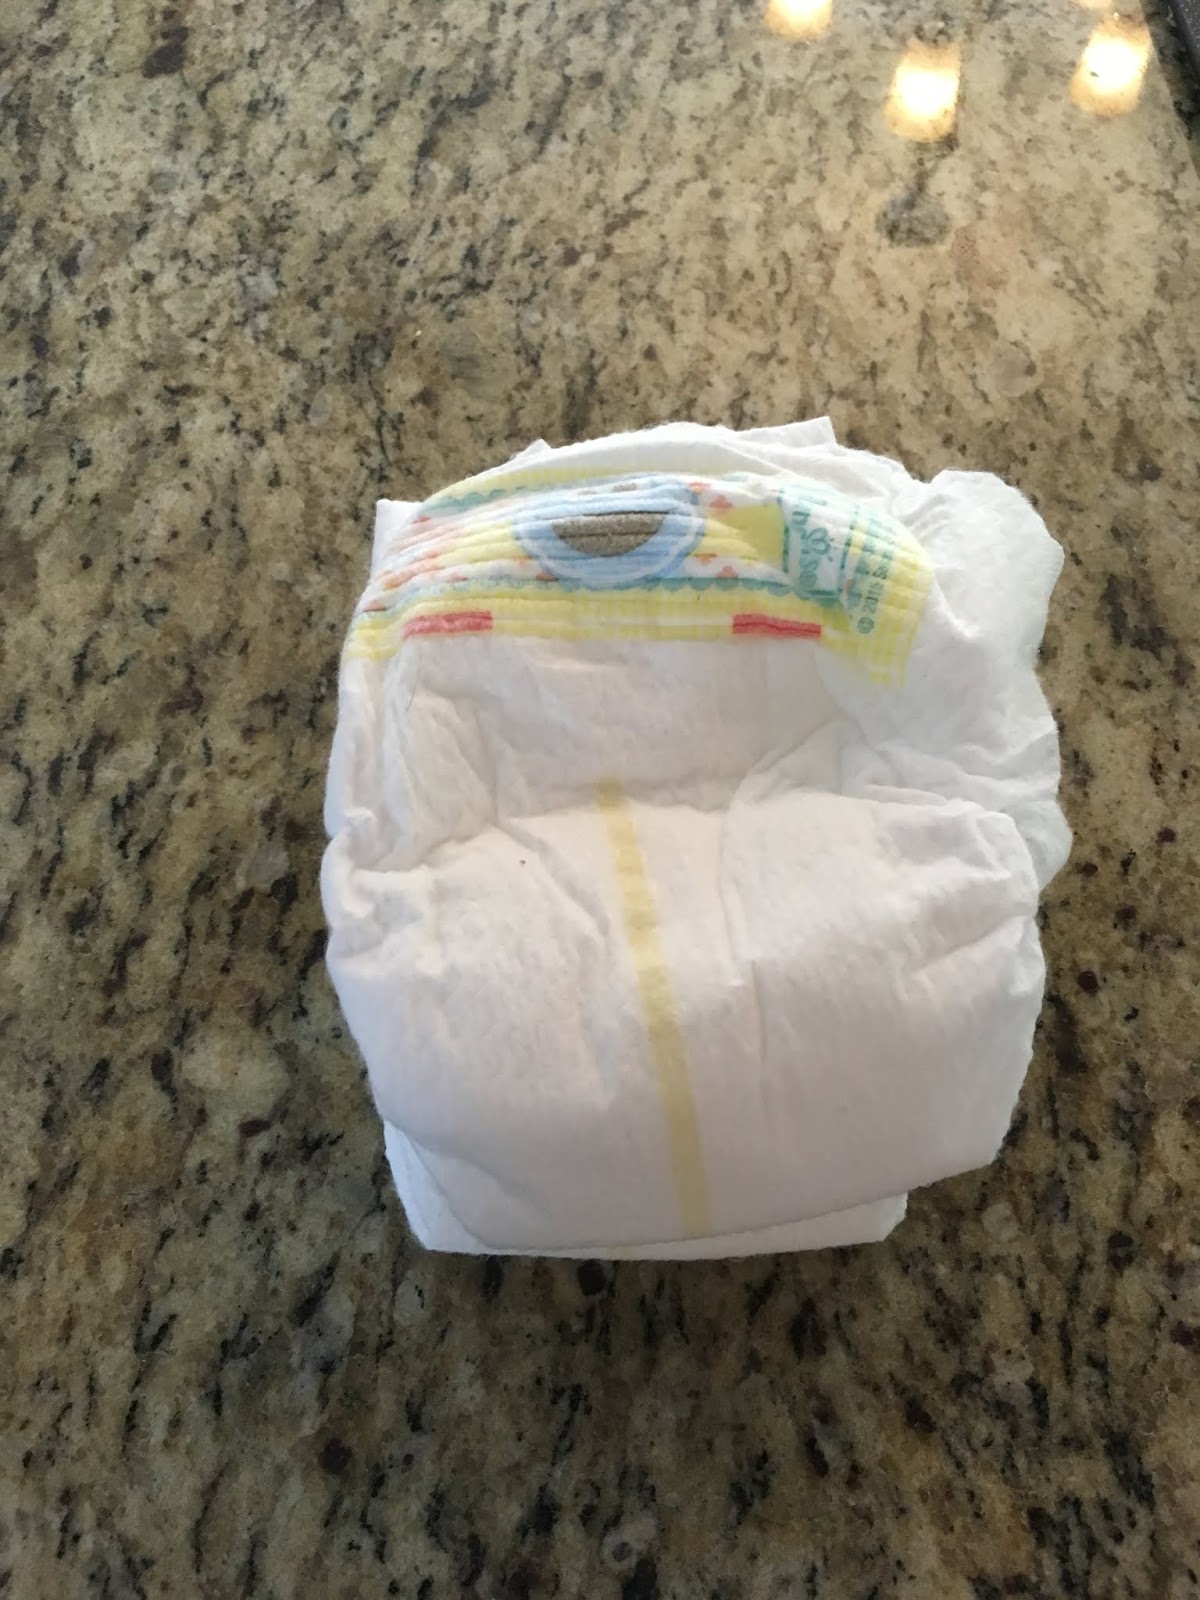
Has your infant outgrown newborn diapers before you were able to use them all up? Don’t throw them away!  Try these ideas instead:

1. Use them as ice packs. While recovering from my c-section, the nurses in the hospital would occasionally give me ice packs for my sore stomach. To my surprise, these packs consisted of ice shoved into an opening in a newborn diaper. As the ice melted it was absorbed into the diaper and did not leak at all. Genius! I will use this in the future for boo boos (maybe even a headache or two). 


2. Use them to water your container plants. I haven't tried this yet, but the internet is filled with videos about using diapers to water your plants.  Take a look!  I know that I will try this on our house plants when vacation time rolls around. 


3. Use them to mop the floor. I tried this today and I must say that I was pleasantly surprised.  


Place a diaper on the bottom of a Swiffer-type floor mop (any mop with velcro on the bottom will do the trick).  I use this natural floor cleaner.  Simply spray your cleaner of choice on the wood floor and go to town! 


4. Use them for packing up fragile items. Diapers are soft enough for a baby's bottom, so why not use them to pack up delicate vases?    


If you have found an alternative use for extra diapers, please share in the comments!  


I have not been crazy about every class I've tried with my son, but I must say that this class is a complete winner!  Kindermusik offers a wonderful balance between creativity, movement (which is so needed during the toddler stage), and literacy.

This is a blurb from Jen's Kindermusik website:
"With more than 35 years of experience as the leader in musical learning, Kindermusik International understands music’s unique ability to impact children (and families!) in profound ways.  Across private studios, public schools, and childcare centers in over 70 countries, children, parents, and teachers enjoy participating in Kindermusik’s fun, developmentally specific, and research-based music and movement classes. Parents also appreciate how enrollment in Kindermusik includes home materials, including their favorite songs, stories, and learning activities from class, so families can 'play' Kindermusik wherever they go."

As you've probably determined from the above quote, Kindermusik is an international franchise.  I cannot speak for every Kindermusik class out there, but I can attest to the fact that this particular class, Kindermusik with Jen (in West Hartford), is wonderful! Jen has a very warm way with children.  She is understanding when your child just wants to run around the room like a maniac. She is also extremely encouraging. These are just a few of the reasons why we have continued to take this class.  

Each session of Kindermusic has a theme.  This past session, the theme was all about the outdoors. The songs for this session were great.  During each class, Jen also shows pictures of different animals or objects (according to theme) and plays the sounds that each one makes.  This really helps children make connections with the world around them on a different level. My son particularly loved the bird sounds. After seeing the pictures and hearing the bird sounds, be became kind of obsessed with birds.  We now have a few bird books and he will spot every bird along the way when we take walks.   

Each session,  you will receive a book, a CD with all of the songs sung in class (and more!), as well as an instrument. My son has a growing collection of Kindermusik books and instruments, which he loves. 

Whether it is dancing with scarves, shaking maracas, tapping drums, or playing with the giant parachute (a class favorite), your child is bound to love the movement this class offers.  

If your child loves music and movement, this is certainly a class worth looking into.  There are classes for many different age groups, so feel free to ask about the right fit for your own child. 

A free trial class in usually offered before the start of each session.  For more information, visit www.kmwithjen.kindermusik.com.  You can also contact Jen Ludgin at jenludgin@comcast.net to schedule your free preview class. 


Tinkergarten: A Class for Creative Outdoor Play


Last week I brought my son to a Tinkergarten free trial class. The location was a bit of a drive for us, but I was curious about a class that focuses on outdoor play and using nature to boost a child's empathy, problem solving, and creativity. 

Before the start of the class, I received an email telling what to wear (clothes you don't mind getting dirty and rain boots) and to bring a snack. I popped my son in said style of outfit and we headed out. 

The class was in a state park, which provided a beautiful backdrop. When we arrived, the other students were assembled by the teacher at the center of an open field by the side of a little lake. A red covered bridge crossed a stream that ran a few yards from the lake. It really couldn't have been more picturesque. 

The teacher greeted us as we approached and handed me a little metal bucket for my son.  She said that our job was to wander around the area and to collect "nature treasures."  We ambled around the field and onto the tiny beach by the lake while picking up stones, sticks, and yellow dandelions. 

After a while, the teacher called everyone back to her.  She had all of the kids sit on a tarp while she read Stone Soup (one of my childhood favorites). Next, she pulled out a big cooking pot and announced that they would be making stone soup.  She informed the children that they would need to use their imaginations as they again took their pails and searched the area for "ingredients" for their own soup.  Pine cones were carrots, sticks were celery, and, of course, stones came into play. 

After collecting all of the ingredients, the children, parents, and teacher headed back to the big pot. They added their ingredients one at a time.  A few kids went to get water from the lake to add to the "soup." The students took turns mixing the soup.  At the end of class, everyone had a snack brought from home. 

All in all, it was very cute and everyone seemed to really enjoy the activity. 

I have to say that my son did enjoy collecting sticks and putting his hands in the sand and dirt, but I do think he was a little too young for this class.  

I'm glad we went to the trial class because now I know that I would sign him up in a year or two, but also that I wouldn't spend the money on it at his current age (He's nineteen months old and we can collect sticks and rocks at the park for free). The class is marketed for children 18 months to five-years-old, however, the kids who were a bit older seemed to get much more out of it.  I would recommend this class for children ages 3-5.  
It is pouring today, which has me thinking of the old saying: April showers bring May flowers.  If this is true, we should have a ton of flowers come May.

I love flowers and gardening, and I just can't wait to get started.  If you're like me, your green thumb is raring to go.  If you are not into gardening, but want to give it a try, here are some important things to consider:

* Most of Connecticut is located in Zone 6 (6a and 6b).  This means that our last frost usually happens around May 1st. You can start planting certain veggies (like snap peas) in May.

* Find a nice, sunny patch of land for your garden. 

* If you don't have a sunny patch, worry not.  There are plenty of veggies that can tolerate partial shade, like spinach and kale. Click here for a list of said vegetables. 

* Start small.  You don't need a huge garden to begin.  If your garden is successful this year, go bigger next Spring. 

* Plant vegetables that you will not get sick of.  Last year, I went crazy planting string beans and by the end of the summer I was pretty tired of them.  The tomatoes, on the other hand, were great to have all summer long. 

There are many benefits to gardening with children.  Gardening can encourage children to eat vegetables, as they are proud of what they've grown and eager to try it. Gardening can even relieve stress and provide and outlet for your child. 

Whether doing a container garden in pots, or sectioning off a portion of your yard, get your hands in the dirt and see what you can make grow! 


You may be saying, "Cord blood banking? Wha?"

My husband and I had never even heard of cord blood banking until a few years ago, when one of my husband's cousins had mentioned it after the birth of her twins.  Even now, I only know a handful of couples who have opted to save their baby's cord blood.

The idea of cord blood banking was very appealing to me from the get-go.  The cells saved when cord blood is stored could potentially save your child's life later on.  Hopefully you'll never need to use it, but it is nice to know that it is there.

According to Viacord, the stem cells collected for cord blood banking can help to treat a number of ills. Current stem cell uses range from treating various types of cancer to blood disorders, to metabolic disorders, to immunodeficiencies. If your child needs a stem cell treatment, you will already have a 100% match.  If a sibling of that child is in need of a similar treatment, that child will have a 75% chance of a match (using a siblings cord blood cells).

Here are a few things to consider when dealing with cord blood banking:

Public vs. Private Banking
After deciding whether or not to store your baby's cord blood, it is important to consider what sort of banking you'll use. This could be the subject of an article on its own, but here's a quick summary of each:

If you choose public banking, you are donating your child's cells for public use.  If your baby's cells are a match for a sick child, they can use those cells, and visa versa.

If you decide to go with private banking, your child's cells are only used for your family.  You will always have access to those cells, so long as you continue to pay the storage fee.

Cost
This is the rough part!  Cord blood banking is very pricy.  There is an initial collection and storage fee, usually followed by an annual fee to maintain the storage of cells.

The Process of Collecting the Blood
You receive your kit just prior to your due date.  You will bring this with you to the hospital. Immediately after the birth of your child, the umbilical cord is clamped and the cord blood is removed via syringe.  It is a painless and quick procedure, for both mama and baby. The doctor packs everything into a little cooler and a number is called for pick-up (Your kit is picked up that day). Easy Peasy!

What if you are having a c-section?
It is still possible to store your child's cord blood.  It is also perfectly safe. Click here for more information on collecting cord blood during a c-section.

Want to learn more? 
Visit the following links below to learn more. It's a great idea to discuss this with your OBGYN and pediatrician, too.  See what they have to say about it.

Most importantly, trust your gut.


Resources

This is a step-by-step guide to cord blood banking from What to Expect.

Cryo-cell also provides information on banking cord tissue.


It's a rainy day and I am craving something hearty and warm for dinner.  The only problem is that I have no desire to cook.  I usually make dinner when my son is napping, but I don't always want to spend that whole time cooking.  I need some me time too.

My solution to this problem is lentil soup.  It is hearty and delicious.  The bonus is that it literally takes 15 minutes (probably less) to make.


I use low sodium chicken broth, frozen lentils, pre-chopped mirepoix (onions, carrots, and celery), half a ham steak, olive oil, and Mural of Flavor (a spice mix from Penzeys).  

I basically dump all of the ingredients into a soup pot and let it simmer until dinner time, leaving me ample time to write, read, or take a cat nap.  Purrfect! 

Ingredients

32 oz. low sodium chicken broth
16 oz. bag frozen lentils
1 container of pre-chopped mirepoix
half a ham speak, chopped into half-inch cubes
olive oil
3 shakes of Mural of Flavor spice mix (you can use your favorite spice mix)

Add some oil to a soup pot on medium heat.  Dump the mirepoix and spice mix into the pot and give that a little stir. Add the lentils, followed by the broth. After the soup starts bubbling, reduce the heat to medium low and cover.*  Simmer until your ready to eat.  

I usually serve this with a slice of havarti cheese mixed in.  I sprinkle the top with crackers.  It is so good! 

 Enjoy!


*You can also put the heat on low and just let it slowly cook for hours.  This is a no stress approach to awesome soup. 

Does living in 2017 make you feel like a Barbie Girl?

My answer is "yes", and here's why:

Plastics are EVERYWHERE! It's impossible for the average American to completely avoid the use of plastics, but limiting your consumption of plastic products is a good idea.

I recently read this article about a yogurt cup from 1976 that washed up on a beach in Canada this past year.  It is remarkable how new it looks, hardly like a piece of trash that has been in the ocean for 40 years.

The article states that plastics take hundreds of years to break down, and in the meantime can cause serious harm to the environment.  It also says that the average piece of plastic takes 450 years to break down.  THAT IS NUTS!  With the amount of plastics we are using on a day-to-day basis, it's a wonder that we aren't already knee deep in plastic waste already.


I am not only bothered by the pollution created by the use of plastic, but also the effects of plastics on the human body.  Much of our food is packaged in plastic, and in some cases chemicals can leach from the packaging into the food. 

You can read more about plastic pollution HERE and about the effects of using plastics on the human body HERE.

Yes, it is impossible for most to completely avoid the use of plastic, but why not cut it out when you can? Here are some things to try to do just that.

Ways to limit your consumption of plastic products

1. Switch from plastic to glass containers for food. I bought these instead of continuing to use plastic containers for storing and heating leftovers. They're easy to clean and are still stackable when not being used.

2. Avoid using plastic bags at the grocery store.  This is not anything new, but it does help.  We create so much waste by not using reusable bags at the store. Plus, there are few things more frustrating than having one of those cheap bags fall apart on you from the car to the house. Just ask my husband! Every grocery store now offers reusable bags.  Why not get one? I also LOVE these for produce.

3. Try to buy items packaged in paper, cardboard, or glass.  I know it's easier said than done, but any little bit helps.  I've been experimenting with different bar shampoos.  I really like this one.  It is just like a bar of soap.  It makes a great lather and smells lovely.  I would recommend rinsing with apple cider vinegar to condition. (I want to try this too!) I was surprised how nice it made my hair feel.

4. Using  laundry detergent packaged in cardboard and wool dryer balls can make your laundry routine plastic-free. Adding a little essential oil to the dryer balls can give your clothes a nice scent.

5. Limit plastic wrap when storing food. I've been trying these and have been pretty pleased with them.  They don't cling as well as plastic, but they do work.

6. Buy clothing made with natural fabrics.  Also, buy non-plastic baby chew toys/baby toys.

I'm not saying to go crazy here, but every little bit helps.  If we can make even a tiny impact on keeping this planet healthy for our children, then I'd say that's a step in the right direction.
Even before having my child, I was very cautious about the foods/preservatives/chemicals I put in, and on, my body.  I avoid using shampoos with phthalates and SLS (among other chemicals), I try to eat whole foods (avoiding processed), and I've always avoided sugar substitutes as a rule. It was fitting that I continue this trend with my son.

When my son was young he developed acid reflux, which the doctor prescribed a medication for.  We went to the drugstore and bought said medication.  It had a strong minty smell and you could tell that there was alcohol in it.

The strong scent led me to check the ingredients list. Yes, there was alcohol in it- That didn't really shock me.  What did shock me was the presence of sodium saccharin in the medication.

I remember my mother telling me that saccharin was carcinogenic.  She never let my sister or I chew gum containing the artificial sweetener.

Upon researching saccharin, I found that it was classified as a carcinogen in the 1970's, but has since been declared "safe." It still doesn't sit right with me and I don't like the idea of giving it to a small child.

Why is this in children's medication? Wouldn't stevia be a better choice? Heck, wouldn't sugar be a better choice if something needs to be sweetened?

We ended up using other methods of treating my son's reflux, which he grew out of quickly anyway.

Flash forward one year and we find saccharin again:  This time in our son's toothpaste. Really?! It is unfortunate because he loved the toothpaste's flavor.  Now we're using a toddler toothpaste made by Toms of Maine. The flavor isn't as good, but it doesn't have as much artificial junk in it.

Have you been surprised to find certain ingredients in your baby/toddler products?


Lemon-flavored foods have always made me think of Spring and Summer.  I make lemon scones, shortbread, and muffins during those months when it's not too hot to bake.

I love lemony baked goods equally well during the winter months.  The citrus helps to wake me up on cold, dark winter mornings.


Lemon Bread
1 stick of butter, melted
1 cup of sugar
2 eggs
1/2 c. of milk (I used whole milk because that is what we have in the house right now)
1 1/2 cups flour
1 tsp. baking powder
1/2 tsp. salt
the zest of two lemons

Lemon Glaze
juice of one lemon
powdered sugar
zest of half a lemon
(I would play around with the sugar/juice ratio until you have the thickness you desire)
1 tsp. of dried lavender (optional)

Preheat the oven to 350.

In a large bowl, cream the butter and sugar together.  Add the zest.  Add the eggs, one at a time, followed by the milk. Next, add the dry ingredients.

Pour mixture into a greased loaf pan. Bake for 55-60 minutes.  Let cool for five minutes or so. While, it is slightly cooling, mix up the glaze.  Pour over the loaf.  Allow to fully cool.

Enjoy this with a nice cup of chamomile tea before the kids wake up, though they are sure to love this too!  

When the weather just isn't cooperating, moms and dads need indoor activities to keep the kiddos occupied and engaged. I'm all for an occasional TV show here and there, but I wouldn't want to lean on that crutch too hard.  I'd like to have a slew of fun activities for indoor play that don't include a screen.  I'm hoping to post on indoor activities every now and then to keep a list going. If you have a special activity, please feel free to comment.

An activity I'm looking forward to is reading The Gingerbread Man, followed by making gingerbread cookies!


My son LOVES his pancakes.  I usually make pancakes with a smashed banana, some flour, an egg, a bit of milk, and some vanilla.

I realized that I did not have bananas this morning and would need to improvise. I looked through what was left of the baby food in the pantry, and found apple/pumpkin/carrot puree. It looked like a good choice, so I went with it.

Originally, I was only going to use baby oatmeal as the "flour" in these, but the consistency wasn't right. I ended up adding 3 heaping teaspoons of flour.  They turned out to be really good, so I thought I'd share.


Pumpkin Spice Pancakes

1/2 c. Baby oatmeal
1 package baby food (I used apple/pumpkin/carrot)
1 tsp. Cinnamon
1 tsp. Vanilla
1/3 c. Milk
2 eggs
3 heaping tsp. flour


Mix all of your ingredients together.  Let some butter (or coconut oil) melt in the pan. Make those pancakes!


Cinnamon's competition has arrived!

As much as I LOVE cinnamon, and I do love cinnamon, I have been increasingly drawn to a different spice: Cardamom.  If you want to blow your mind this Fall, add cardamom to a baked good that usually only calls for cinnamon.  This extra spice will bring your desserts to the next level.  The following recipes are bound to be a hit with your kids too!

Cardamom Spiced Applesauce Cake
2 eggs
2 1/2 c. all-purpose flour
1/2 c. brown sugar
1/2 c. white sugar
1/2 c. maple syrup
1 1/2 tsp. baking soda
1/4 tsp. baking powder
tiny pinch of salt
1 tsp. cinnamon
1/4 tsp. clove
1/2 tsp. ginger
1/2 tsp. nutmeg
1/4 tsp. cardamom
1/2 c. vegetable oil (I use olive oil)
1/2 c. water
1 1/4 c. unsweetened applesauce
1 c. nuts (pecans or slivered almonds)

Maple Apple Cider Glaze
1 1/2 c. powdered sugar
2 TBSP. apple cider
1 TBSP. maple syrup
dash of cinnamon, cardamom, clove, nutmeg, ginger


Preheat the oven to 350.  Mix all of the ingredients and pour into a greased square 9x9 baking dish. Bake for an hour before checking doneness.  This cake may need to be put back in the oven for a few minutes.  It is done baking when you can poke the cake with a toothpick and it comes out clean.

Once the cake has cooled slightly, arrange nuts on tope of the cake.  Mix the ingredients for the glaze and pour over the cake. Let cool.

Pumpkin Pie
1 can pumpkin puree
1 can sweetened condensed milk
2 eggs
1 pre-made graham cracker crust
1 tsp. cinnamon
1/4 tsp. clove
1/2 tsp. ginger
1/2 tsp. nutmeg
1/4 tsp. cardamom

Pre-heat oven to 350.

Mix all of the ingredients together.  Pour the mixture into the pre-made crust, and pop it into the oven. Bake for 55 minutes or until the pie is firm when jiggled.

This will make your house smell amazing!


You may have read the post title and uttered an audible "eck!" You may cringe at the thought of mushy tofu. I felt that way once too, but in experimenting with the flavorless soybean curd, I have found a few recipes that I really enjoy.  This is one of them.  If you like chicken salad, but you're trying to cut down on cholesterol, this is a fabulous alternative.

This is my vegetarian spin on curried chicken salad.  It uses a mild caribbean-style curry (I like Badia brand), grapes, carrots, onions, and celery.  I have also found a cholesterol-free mayo that could easily be Hellmann's in disguise.  Just Mayo (that's what it's called).  I first stumbled upon this brand in Whole Foods, but have since seen it in many grocery stores.  I love this stuff!

Lightly Curried Tofu Salad 

Tablespoon of olive oil
1/2 c Just Mayo
2 c of cubed tofu (one inch cubes)
1/2 c of Stop and Shop pre-chopped mirepoix (chopped celery, onion, carrot)
salt and pepper
Badia brand curry powder
paprika
1/4 c grapes, thickly sliced


Heat the olive oil in a frying pan and add your tofu cubes.  While the cubes sizzle, add your spices.  I like to play with different levels of spice, so the quantity is really up to your own taste.  Sauté the tofu until it is slightly crispy on the outside.  Remove from heat, and allow the tofu to cool in a big bowl.  

Next, add the mirepoix and grapes.  I bought a pre-made mirepoix from Stop and Shop.  You will find this in the produce section.  Add your mayo.  

Heap some of this tofu salad on your favorite bread.  It's great with some crunchy lettuce.  

Enjoy! 


When planning our son's birthday party, we landed on the monkey theme because we call him "Monkey" all the time.  We thought our theme could be "Our Little Monkey is Turning One!"  It felt odd to plan a somewhat tropical party when everyone in the neighborhood was starting to hang Indian corn on their doors and placing bright orange pumpkins out on their front steps, but we were going for it!

I'm pretty happy with how things turned out.  We found some pretty neat decor ideas on Pinterest, which I will post below.  We bought some of the decorations and cups/plates/cutlery on Amazon. The streamers and balloons were from PartyCity.  The paper bunting was a DIY and the materials for that were from A.C. Moore.  I like A.C. Moore because they always have coupons.

Please scroll down to see the decorations we made.  I have included steps.  They are really easy to recreate.  I hope these help if you are considering a monkey theme for your little monkey's birthday. Have fun!

Burlap and Paper Bunting

You Need: Scissors, various yellow patterned card stock paper, zigzag scissors, hole puncher, burlap cording, Pre-assembled burlap bunting, letter stickers

Assembly:
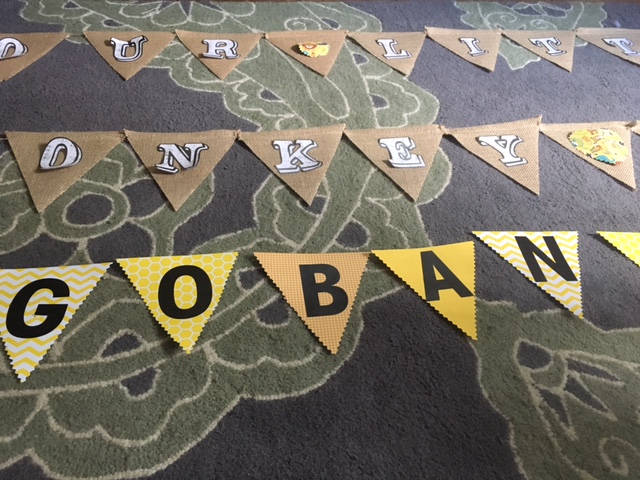
I made two different bunting-style signs for the party.  One of the signs was for the entrance to the party and read, "Our Little Monkey Is 1."  The other sign was for the candy table and read, "Go Bananas."  (This party was largely a family party and only three children were present, which is why I did a candy buffet, instead of goodie bags.  If it had been a true kids' party, I would have done pre-made goodie bags.)

Step 1: Lay out all materials, including the burlap bunting (I bought 2 sets).

Step 2: Cut out 9 yellow triangles with the zigzag scissors for the "Go Bananas" sign.

Step 3: Add the letter stickers to your bunting.  I needed an extra adhesive for the burlap. I also cut out little shapes to use as spaces on the burlap bunting. 

Step 4: Grab your trusty hole puncher and punch a hole on either side of the yellow card stock triangles. 

Step 5: Now, grab that burlap cording and thread it through the holes on the card stock triangles.  I put "Go" on one thread, and "Bananas" on the other. 

Step 6: Hang that ish up! 


Coconut Trees

You Need: Brown balloons, brown crepe paper, green construction paper, scissors, tape

Assembly:
Step 1: Take three pieces of construction paper and place them one on top of the other.  Fold the stack of paper in half.

Step 2: Cut half an oval/leaf shape. Now, cut little wave shapes along the edge of the folded half leaf shape.  (I tended to cut four or so "waves" on the side of the folded leaf.)

Step 3: Unfold the leaves, and voila! You've got coconut leaves!

Step 4: Blow up the brown balloons.

Step 5: Cut your brown crepe paper into four long streamer-like pieces.

Step 6: I usually used three to four leaves, bunched them together and taped them to the ceiling.

Step 7: Bunch three balloons together and tape under the leaves.

Step 8: Take three of the brown crepe paper streamers and tape them under the balloons.

Step 9: You've got yourself a coconut tree!

Candy Bar

You Need: A variety of glass vases for candies, candy scoops, your fabulous new "Go Bananas" bunting, a variety of yellow candies/candies with yellow wrappers, goodie bags, inflatable plastic monkeys (from Amazon)

Assembly:
Step 1: Hang bunting behind serving area.

Step 2: Inflate the monkeys and place on serving area.

Step 3: Place the vases on the serving area and fill with your yellow candies.

Step 4: Don't forget to set out the bags and scoops!


Don't forget the cake! 


The link below is a Hartford Courant article from July, but offers a current list of most of the splash pads in the state.  The majority of these splash pads are FREE.  With this crazy heat wave going on, this information is good to know!

List of CT Splash Pads

What are some of your favorite Connecticut watering holes and splash pads?